
As of today I have exactly 18 months until I turn 30. I wanted to create a "Bucket List" of sorts of 30 things to do/master/accomplish/see before I turn 30. I've been thinking long (since March!) and hard about the list as I wanted them to be attainable goals, but not too easy either. I'm also excited that I'll be blogging about all of them as I go along and I'll check them off my list (which will also show up on the side) as I complete them. So without further ado, the list: 1. Master the art of French macaroons. (Because unfortunately I can't go to Paris every time I get a craving for the deliciousness that is a macaroon.) 2. Sew a … [Read more...]
Tutorial Tuesday: No-Sew Star Banner

Though I used fabric for this project, no sewing is required! Here's what you'll need to make your own star banner: 1 package Heat N Bond (I used Heavy, but Lite will work too.) White fabric Ribbon (Cut out the length you'd like to have, plus 24" extra to allow room on both ends to tie.) Iron Fabric Scissors Star template (Click link to download.) Decide how long you'd like your completed banner to be. *Warning: A smidgen of math is required. You'll place stars approximately every 6", so if you want a 5' banner, you'll need 10 completed stars. Since each completed star takes two shapes you'll need to cut out … [Read more...]
Tutorial Tuesday: Needle Notebook
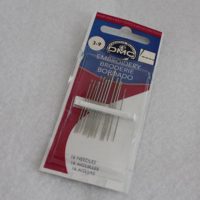
This weekend I made a little needle notebook. Now I have a cute way to store all my hand sewing needles and I just love it! This project all started with a problem: I had a whole bunch of these all over the place. Most of the packages were half broken and not holding the needles very well anymore. I was finding needles all over the place and was getting a little tired of it. My solution was a cute needle notebook. For this project you'll need: 2 different coordinating fabrics (We don't need big pieces so if you have some scraps lying around that should work just fine.) 18" of coordinating Ric-Rac 1 color … [Read more...]
It’s a Craft Party!
A week ago I had such a fun time with some friends and hosted a craft party. Elmer's was kind enough to send me a huge box of awesome craft supplies that we could work with and we had a great Craft and Tell party! (I even had some cool bags filled with goodies for everyone to take home!) Here are just a few of the fun things worked on that night: Celia took the time to make a few Mother's Day cards to send out. Diane used the craft glue as a Mod Podge like product to do some awesome vintage comic book art for her son's … [Read more...]
Happy Friday!
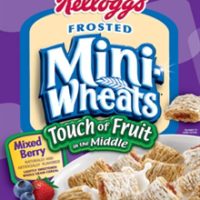
Wow, what a great week I've had! I hope that yours was just as amazing! It all started with going grocery shopping and seeing that Kellogg's is bringing back this cereal: Frosted Mini Wheats Fruit in the Middle. Thank you Kellogg's for starting my week out right! I remember this cereal from many years ago (which is funny since it says it's new) and my husband and I usually brought it up about twice a year as one of those "Hey Remember..." moments. I may or may not have bought 4 boxes... Then the next day in the mail I got my latest copy of Paper Crafts Magazine and was pleasantly reminded that I had a card published in it. … [Read more...]
Tutorial Tuesday: Pieced Fabric Necklace
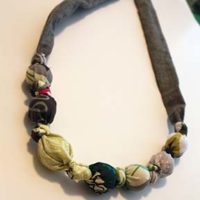
At Christmas I visited with my family and my mom made a few of those cute little beaded fabric necklaces. You know the ones where you make a small tube of fabric, put a wooden bead or marble inside, and knot between each one? I thought it would be fun to make one with scraps of coordinating fabrics I had in my scrap bin. After some math (lots of it!) I figured out how big to make each scrap so that it was just enough to wrap one wooden bead and hide the seam in the knot. I LOVE how it turned out! To make your own necklace you'll need: 7- 3/4" wooden balls 2- 3" x 14" fabric strips 7- 3" x 3 1/2" fabric rectangles (These will … [Read more...]
Different Directions and a BIG Stamp Sale
Hello hello everyone! I hope everyone is safe and sound with all the winter weather everywhere! This post has taken me some time to write and even longer to hit the publish button. It's not something I'm excited about, yet I know it's the right choice for now. I'm sure you've noticed that I haven't been blogging much lately. With my husband going back to school for a second Master's degree I've been working quite a bit which doesn't leave me much time for working on my stamp designs. As much as I'd love to continue with my stamps, at the time, I'm unable to do so. I'll be back to regular craft blogging soon as I haven't stopped … [Read more...]
Tutorial Tuesday: Christmas Stocking with Ruffle
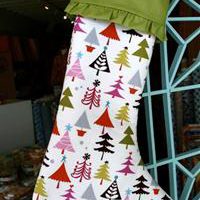
Thought I'd share this stocking pattern I made with you. It's easy to make, comes together fast, and you learn how to make ruffles! Download the full instructions and pattern here as a PDF. Picture from CityCraft. (Where I teach! They've got a great selection of modern fabrics, and they are available to purchase online.) Merry Christmas Everyone! Erin … [Read more...]
Tutorial Tuesday: Ruffled Knit Scarf
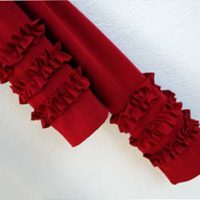
How has everyone been? I've been busy with my sewing classes! I love teaching people how to make things and the sewing projects we've been working on are super fun! I've made a lot of projects recently! This might be my new favorite simple sewing pattern. I can't stop making these, they're super easy to do and make great gifts! The best part about this project is that it's an easy project to start out with knits on. I don't have a serger either, but in the pattern I'll show you a few different stitches on your regular sewing machine that will work on knits! Have fun with it! You can download the full pattern and illustrated … [Read more...]
Tutorial Tuesday: Easy Hostess Gift

Today I made about 4 hostess gifts to get ready for the holiday season in a little less than an hour! I'll show you how! We'll be stamping on fabric today! You'll need some fabric paints, dish towels (I like the flour sack ones...they seem to be the easiest to stamp on.) a foam brush, and stamps. For this project I used the Joyeux Noel set. You'll want to put some paint on your foam brush, but not too much! It should look something like this: Then use the brush as an ink pad for your stamps. Instead of rubbing your stamp on the brush, dab it, exactly like you do to get ink onto your stamp from an ink pad. The stamp … [Read more...]
