I realize I haven't done a home decor tutorial in a while, so how about learning a little about floral arranging? We'll learn a little about arranging silk florals today. Here is a preview of the two projects we'll make. Before we get started there's a quick lesson. (Which can actually be applied to ANY design, whether you're designing a room, floral arrangement, quilt, card, scrapbook page, or fabric.) There are some simple principles and elements of design that any beginning design student learns to recognize. Then, using these principles and elements, can put together a cohesive, pleasing design. These are as … [Read more...]
Tuesday Tutorial: Valentines Day Wreath
Ready to get those Valentine's Day decorations up yet? I'm ready! So here's the first idea for you! It's a wrapped yarn heart-shaped wreath. Supplies you'll need include: That's: Tacky Glue 1 package 2" diameter styrofoam balls 1 package 1 1/2" diameter styrofoam balls Bendable wire Wire cutters Flat-head straight pins 2 skeins of coordinating yarn. I LOVED how the variegated red/pink yarn looked when wrapped around the balls! So I would definitely do one of these, and a different solid color to coordinate. Coordinating ribbon for hanging (not pictured) Ready to get started? Wrap the yarn around the balls. I was worried … [Read more...]
Tutorial Tuesday: Patchwork Pillow
Yep, lucky you! More tutorials today! (I still have a few more also!) I made this for my dad for Christmas. He loves family history, and he's furnishing his home in Germany right now so I thought he might like this: My maiden name is Williamson so I found a Williamson family crest online, made it a little larger in Photoshop then printed it out onto printable fabric. You can buy these fabric sheets at most any craft store. They are 8 1/2" x 11" sheets of white or cream fabric with a paper backing on it. You just run them through your printer at home and heat set with an iron. The color turned out great! If you want to make one … [Read more...]
Tutorial Tuesday – Tile Transfer Art
I wanted to post this earlier, but it took me a little longer than usual to write up this tutorial. Don't let the long list of instructions keep you from doing it, it's actually pretty easy and definitely worth it! Here's some examples of what you can make with this tutorial: Set of 4" tile coasters. (A little boutique store nearby sells a set similar to this for $40. Each tile only costs about .50 so you can make them MUCH cheaper yourself!) I made this tile for me to take to work. I have it sitting on my desk so anytime I want I can peek over and see my husband! It's a little more durable, and I think better looking than putting … [Read more...]
Tutorial Tuesday-Easy Home Decor Blocks
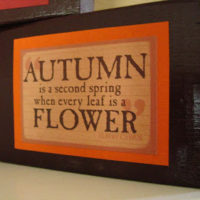
Happy Tuesday! Here's the quick tutorial for today: What you need: Wood scraps, spray paint, cardstock, and cardstock stickers. (I used this one which I bought from my local scrapbook store: It's called Fall Cardstock Stickers from the Timeless Collection for Deja Views.) Here's what I did: 1. Spray painted some wood scraps that I found in the garage a nice chocolate brown. 2. Peel off the cardstock stickers and place onto a piece of coordinating colored cardstock. 3. Trim around cardstock to make a border and adhere to your wood block. Easy as that! If you can't get a hold of the exact page, any fall themed sticker will … [Read more...]
Tutorial Tuesday-Spooky Shadow Box
This is another super quick one! Supplies needed: Shadow Box (get these at pretty much any craft store, even Target and Wal-mart have them) Foam Tape Spooky Patterned Paper Instructions: Cut the patterned paper to fit into the back of your shadow box. Print from your photo editing program a spooky phrase. I used the Bleeding Cowboys font and printed it onto orange paper. Stack about 4 squares of foam tape to each other and tape your phrase to the back. You're finished! Try adding a spider to the front, or a few gravestones. You have lots of space to work with, so make sure you use things with different depths to take … [Read more...]
Tutorial Tuesday-Googly Eye Wreath
I LOVE the googly eyes that you buy at the craft store. What better time to use them than Halloween time! So today's project is a spooky googly eye wreath. It rained last night so I took the picture inside on my pantry door. (I usually have a wreath hanging there too. Who said that you could only use wreath hangers on your outside doors!) I bought the wreath at Michaels using my 40% off coupon. Items you'll need: 1 wreath Glue gun 1 can black flat/matte finish spray paint 1 bottle each green and purple acrylic paint googly eyes in various sizes (my Michaels had a bag with a variety of sizes for about $2) First, paint your … [Read more...]
Tutorial Tuesday-Embellished Candles
I can't believe it's time for Tutorial Tuesday already! This week's project will only take you about 1 minute. Yep, only one minute! For this project you'll need the following: Candles (Any color will work. Since the embellishments are NOT flame proof it doesn't matter too much what they smell like because we're not going to light them. Mine are peppermint, leftover from projects last Christmas.) Halloween/Fall themed ribbon Scotch Transfer Tape (The red Tacky tape will work too.) Now, cut a ribbon piece slightly longer than the circumference of your candle, put tape on the back, and tape the ribbon onto the candle. Done. Hint: … [Read more...]
Trick or Treat!
Here's what greeted the Trick or Treaters tonight! My homemade ghost with felt eyes and a bouncy ball head. And my free spooky Halloween tree. I made Christian go with me and find a spooky dead branch at a little area of trees not far from our house. We found the perfect one and I stabilized it with a bucket of landscaping rocks we had in the garage. Next came little plastic skeletons I had and some orange pipe cleaners made into quick squiggles. I think it turned out alright. Next year I might have to try some orange lights. I also had little luminaries lighting the path. Some of the older boys found those amusing. In … [Read more...]
Halloween Wall Art
Here it is: And here's how it's done. It's pretty easy. I used two different FREE downloaded digital scrapbooking kits: Coralee Evans, aka MzCora Halloween Mega Kit found at http://mzpimptress.vox.com. This kit is awesome! So many different papers and embellishments! (She just emailed me and let me know that her site where the Halloween Kit is found is down at the moment. If you leave a comment with your email I can email you the pages that I used to make the kit.) Ronna Penner of Scrapadelic.com ExpressYourself alphabet found at http://www.scrapadelic.com/ (Well, it was found there, but I think it was a limited time only kit for … [Read more...]
