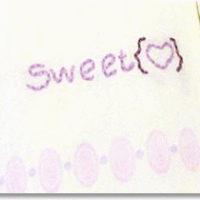
Happy Groundhog Day!! I'm hoping that spring will shortly be here, although so far the Chicago winter hasn't seemed that bad! Guess what? It’s Tutorial Tuesday time! I did some super cute, and super easy napkins…just in time for Valentine’s Day! Supplies: Build A Border stamp set 4 blank cotton napkins Violet Permanent Ink (I used the ColorBox pigment inks) Coordinating skeins of embroidery floss- 1 Dark and 1 Medium/Light Violet Water Soluble Fabric Marking Pen FREE Embroidery Pattern Ready to get going? Stamp the large oval border with your lighter ink about 1 ½” above the hem line. Stamp the dotted … [Read more...]
Tutorial Tuesday – Stamped Spring Napkins!
These were super simple to do! I used the stamps from the Have A Tweet Day stamp set. These are cotton napkins I found for $1 a piece at Garden Ridge. Just pull out your ink and stamp directly onto the napkins! It's easy using the clear stamps because you can see exactly where the image is going, and you can make sure that you have ink covering the entire image before you stamp. Use a permanent ink like Stewart Superior's Hybrid ink. Heat set it with your iron without using steam and you're ready to go for a wonderful Easter brunch! I love the little bird feet border on this one! And a little nest garland with occasional eggs! Happy … [Read more...]
Tutorial Tuesday-Quick Napkin Rings
Alright, how about another super quick project? I found this awesome clear transparency "paper" from Hambly Prints (I love Hambly Prints!) and thought it would look really fallish with an orange background. Is fallish a word? Anyway, here are the directions: Cut a 12" long, 1 1/2" wide strip of the orange paper. Cut in half and this will be the base for two napkin rings. Cut a 12" long, 1" wide strip of the transparency paper. Cut this one in half as well. From here, you can make the more modern one, or the one with the ribbon. Modern: Wrap around and staple. All done! Ribbon: Set two eyelets about 1/4" inside of the ends. … [Read more...]
Countdown to my 100th post!
On to the countdown related stuff in a minute. I took a break from some paper crafts yesterday to do a purely embroidery project. It's another napkin, but this time no stamping, just pure embroidery. It all started with this book: I was searching through the selection of books at Half Price Books (I LOVE Half Price Books!!!) and pulled this one off the shelf. It didn't have a spine because it's a spiral bound 225 page book. From the cover I thought it wasn't going to be worth it, but I opened it anyway and the minute I did, I just sat there, so elated, that I had in fact decided to open the book. There are over 200 pages of embroidered … [Read more...]
July 4th Project
This project is along the same lines of stamping on napkins. I wanted a little more pattern on these ones. Items needed: 1 fat quarter fabric (for those that aren't quilters it's where they take 1 yard of fabric and it cut into quarters) StazOn ink various colors embroidery floss I cut out scraps of a neutral color fabric (thanks again Celia for the scraps!) I stamped the star from the Bough set and hand stitched around the image. I used a french knot at the star points, and a straight stitch for the outline. I used the water soluble pen to write "freedom" and "liberty" and then I free stitched those. I trimmed each one with … [Read more...]
Tutorial: Stamping is fun on fabric too!
Ok, so you remember what happens when I do a tutorial right? I'll be giving away something that you'll need to complete the project. And this time you get a choice! The winner will get to choose between a brand new StazOn ink pad, or a set of 4 ready-to-be-stamped-on napkins. So, after the tutorial be sure to follow the directions to enter! I made a few napkins this weekend. Of course I used the new stamp sets! I wanted some for birthdays or if we have company over for dessert. I used the Hey Cupcake set and the StazOn ink. The StazOn ink is permanent. Then I just embellished the cupcake with french knot "sprinkles". (Thanks to my friend … [Read more...]
