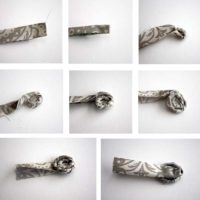
I'm in love with the new ring I just made! Isn't it cute! It's a little fabric flower ring! I love how they only take a very small amount of fabric (or ribbon!) so raid your scraps and see what you've got! You can also use ribbon you've got lying around too! (Here's a little tip for you: If you want to make a custom color of ribbon, try coloring a white or ivory ribbon with your Copic marker. It's permanent and you can make it any color you want to match a project or outfit!) What you'll need: 8" x 1" pieces of fabric strips (or ribbon) Ring blank Hot glue gun Velcro Coordinating beads Tacky Glue Take your … [Read more...]
Ribbon Flower Embellished Card
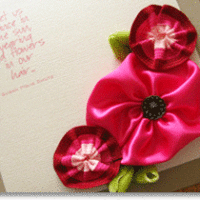
Ok, so I got a little carried away with these ribbon flowers and made a few extra. Then I experimented with some different widths of ribbon. Here's a card I made with a few of them. The larger flower was made from some 1 1/2" wide satin ribbon. I LOVE how it turned out! I added a fancy brad in the middle for a little accented touch. What do you think? I'm thinking they would also make great hair clips, brooches, or embellishments on a little handbag! … [Read more...]
Ribbon Napkin Rings
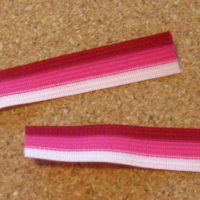
I found this awesome striped ribbon on clearance at the fabric store and knew I could do something with it. I let it sit for a few days on my craft table while I mulled over what to do with it...and here's what happened! Want to make your own? It's easy! Here's how: Gather the following supplies: Ribbon for napkin ring, flower and leaves. Needle and thread Hot Glue Gun Cut a 5" piece of ribbon for the flower and one for the napkin ring. I used a plain pink satin ribbon for the ring part. Turn under one edge and hand stitch (or machine if you prefer) to make a ring. Do this for both the flower and napkin ring ribbon. Set … [Read more...]
One of my favorite projects
This is one of my favorite projects that I've used a few times this week already! Ribbon Bordered Picture Frame. See here for the complete instructions. Why have I used this tutorial several times this week already? Well, you see, last week my husband got into the MBA program he was hoping to, and it's not in the area, which means that we're moving---to Chicago! And very soon too as his semester starts in June! So, I've been madly staging the house to sell and this tutorial works great for adding a little something extra to your pictures. I'm excited about the move, but also sad that we'll be … [Read more...]
Custom Picture Frame
This is what I started with: -Picture Frame (I got this from Target, my favorite store ever! It was a set of 5 different sizes for $10. -Scotch Transfer Tape (I'll have this in my store because it is the MOST AWESOME tape ever!! It comes in HUGE rolls and is really inexpensive, and it works for glass, plastic, paper, ribbon, and is permanent.) Terrifically Tacky tape will work too. -1 yard of ribbon per frame (I got all ribbons shown for $1 each at Hobby Lobby and Michaels.) Start with a frame of your choice. You don't even need to take out the glass, just make sure that the glass is clean. Tape your ribbon to the glass right up … [Read more...]
Easy Coordinated Ribbon Tutorial
Ok, so I love mixing different colors of ribbon for a project but sometimes it can get to be expensive to buy multiple widths, colors, and textures, just to get a few that coordinate. So here's another option: Looped Decorator Fringe You can get this fringe anywhere that sells home decor fabric. They have some at all the major craft chains and if you live in the suburbs north of Dallas try Childress Fabrics. (They have two locations, try their Frisco location.) It will look like this: When you buy it, make sure that it has loops at the bottom, and is not cut. If it's not looped it will not work. I bought about one yard for $4.00. … [Read more...]
