Thank you everyone for such wonderful, encouraging comments! I truly appreciate all of them! Today's project is super quick. Just print the PDF on cardstock (download here), cut down the middle, embellish as needed, and you've got two Valentine's Day cards. I love how simple they are, and I love how the text plays with the positive and negative space. Try tying a ribbon around, or adding a few rhinestones. Next week I've got a quick home decor project and a mini floral arrangement lesson for you!And if you're wondering why the project is so super quick today, it's because I'm working on some new items for the store, like more stamp sets … [Read more...]
Tutorial Tuesday-Valentine’s Pillow Boxes
Here's another quick valentine's day project for you! This one is super easy and fast! It's a cute little Valentine's Day pillow box. Just download the PDF by clicking here. It includes one complete box and four sentiment hearts for the front. They say: SWAK Love, me Happy Valentine's Day XOXOX The PDF will look like this: All you'll need is: 1 sheet of cardstock per box 12"-15" of coordinating ribbon foam tape Just cut around the edge of the box, fold the bottom and top on the slightly curved line, fold the tab and use double sided tape to close the box. Tie a ribbon around the box, and use foam tape to adhere … [Read more...]
Tutorial Tuesday – Valentines Treasures
I am super excited! I have sooooo many downloads for you today! I've got a project, card, AND a Valentine's Day font for you! All FREE! And a sale in my shop if you don't have any of the cute silver DVD tins for storing your treasures in! All the papers and labels needed for this project can be downloaded. In addition to the label PDF here and the case cover PDF here you'll need 1 bag of Hershey's Treasures and 1 DVD tin, some double sided tape, and glitter if you want a little sparkle. I used the Diamond Stickles. This color is awesome because it takes on the color of whatever you put it on, essentially getting many different colors … [Read more...]
Tuesday Tutorial: Valentines Day Wreath
Ready to get those Valentine's Day decorations up yet? I'm ready! So here's the first idea for you! It's a wrapped yarn heart-shaped wreath. Supplies you'll need include: That's: Tacky Glue 1 package 2" diameter styrofoam balls 1 package 1 1/2" diameter styrofoam balls Bendable wire Wire cutters Flat-head straight pins 2 skeins of coordinating yarn. I LOVED how the variegated red/pink yarn looked when wrapped around the balls! So I would definitely do one of these, and a different solid color to coordinate. Coordinating ribbon for hanging (not pictured) Ready to get started? Wrap the yarn around the balls. I was worried … [Read more...]
Merry Soaps
I know it was just yesterday that we made yummy Krispy treats but here's another great, simple, quick gift. I asked my husband to help me name this tutorial and he suggested Merry Soaps: so here it is! I started with the $1 bottle of soap from Wal-mart. (For your project, any clear soap will do, as long as the label is easy to remove, and there's no printing on the actual plastic bottle. This had a sticker on the front and the back but they were easily removed.) Print out a few words onto a transparency with a laser printer. (Don't use your inkjet printer because the ink is NOT waterproof. Print out what you'd like and take it to … [Read more...]
Tutorial Tuesday: Krispy Treat Gifts
I hope everyone had a great weekend! I had a LONG week last week so I was glad to get some relaxing and crafting done. I had a mini crisis when I realized Christmas is almost here! (Or at least, the time to send out all packages so that they get to family in time!) At work we use Photoshop a lot but I've been trying to use Illustrator a little more so today's tutorial I created for you in Adobe Illustrator! I hope you like it! This is a simple gift that would be great for neighbors or a stocking stuffer. It's also great for those that work. I've been taking it to work and it can be made in the microwave! It's a perfect single sized … [Read more...]
Tutorial Tuesday-Easy Home Decor Blocks
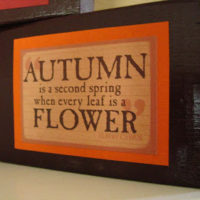
Happy Tuesday! Here's the quick tutorial for today: What you need: Wood scraps, spray paint, cardstock, and cardstock stickers. (I used this one which I bought from my local scrapbook store: It's called Fall Cardstock Stickers from the Timeless Collection for Deja Views.) Here's what I did: 1. Spray painted some wood scraps that I found in the garage a nice chocolate brown. 2. Peel off the cardstock stickers and place onto a piece of coordinating colored cardstock. 3. Trim around cardstock to make a border and adhere to your wood block. Easy as that! If you can't get a hold of the exact page, any fall themed sticker will … [Read more...]
Tutorial Tuesday: Holiday Cards plus Giveaway!
The holidays will be here before we know it, and if you're like me, you might just wait until the last minute to make those holiday and Christmas cards. Here's a few ideas I whipped up that look great, but take a minimal amount of supplies and time to create! For all the embossing I used my Cuttlebug. If you don't have an embosser, try paper that is already embossed, or just a nice pattern will work great also. The sentiment on all say: may every day of this new year bring you a reason to celebrate. I just printed these directly onto the cardstock with my printer. That way, you can create any sentiment you want, and aren't just limited … [Read more...]
Tutorial Tuesday-Spooky Shadow Box
This is another super quick one! Supplies needed: Shadow Box (get these at pretty much any craft store, even Target and Wal-mart have them) Foam Tape Spooky Patterned Paper Instructions: Cut the patterned paper to fit into the back of your shadow box. Print from your photo editing program a spooky phrase. I used the Bleeding Cowboys font and printed it onto orange paper. Stack about 4 squares of foam tape to each other and tape your phrase to the back. You're finished! Try adding a spider to the front, or a few gravestones. You have lots of space to work with, so make sure you use things with different depths to take … [Read more...]
Tutorial Tuesday-Googly Eye Wreath
I LOVE the googly eyes that you buy at the craft store. What better time to use them than Halloween time! So today's project is a spooky googly eye wreath. It rained last night so I took the picture inside on my pantry door. (I usually have a wreath hanging there too. Who said that you could only use wreath hangers on your outside doors!) I bought the wreath at Michaels using my 40% off coupon. Items you'll need: 1 wreath Glue gun 1 can black flat/matte finish spray paint 1 bottle each green and purple acrylic paint googly eyes in various sizes (my Michaels had a bag with a variety of sizes for about $2) First, paint your … [Read more...]
